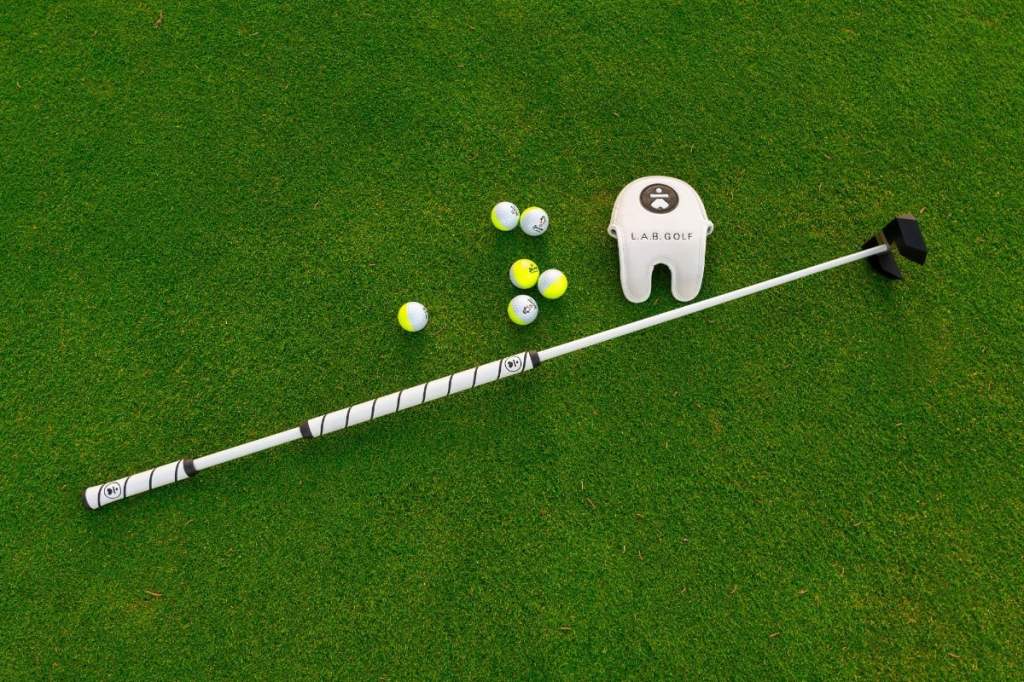
A couple of months ago, I switched to a broomstick. You can see my review here, but in summary, the results have been mostly good, with some ups and downs, mainly due to a lack of instructional information beyond the basic “This is how you hold a broomstick”. As I went through the learning process, I’ve put together some learnings on switching, mostly the undocumented things that no one tells you.
If you have any questions or other learnings, feel free to let me know. I’m not professing to be an expert, and I’d welcome anyone to correct me on anything I post. It’s a little long, so I apologise if you can’t get through the whole thing or use it as bedtime reading to help yourself get to sleep.

1. It’s nothing like normal putting
This may seem obvious to some, but I didn’t realise it was that different. Switching to a broomstick is hard work. Part of this misconception is seeing the likes of Lucas Glover and Will Zalatoris switching to a broomstick with a large amount of success. We probably haven’t seen weeks of intensive putting practice with a coach, and I would hazard a guess it’s been at least 2 + hours per day to get to a point where his putting was at competitive levels.
Let’s also not forget that while they may have been bad by tour standards, they would still obliterate most scratch handicaps at putting. They know how to read slopes, putt up hill and down hill.
The problem is exacerbated by the flawed perspective we get from YouTube and the internet. The problem is you don’t always get the full picture. It’s not dissimilar to photography and Instagram. We see a photographer post a photo of a beautiful location and the one before it is beautiful at a different location. It looks like he only takes beautiful pictures, but he doesn’t. Behind the average Instagram photographer, you’re seeing one of the twenty to thirty photos they took that looks amazing. You’re not looking at the other 29 which weren’t as good.
When you watch some youtuber golfer video of them testing a broomstick, it seems like it all comes naturally. you don’t see the 12 practice putts that were bad before the one that was shown. Bad putts don’t sell referral links and discount codes to putter sales, and many of these youtubers rely on referrals from discounts to help fund their channels. Bad putts make it seem harder than it is to switch to a broomstick and we’re an instant gratification culture where we want additional performance just by making a purchase.

2. Grip is more than just comfort
When I started putting with a broom, the initial results were really good – 28 putts good. I won monthly medal. After about a month, I made a grip change from claw to pencil because it felt more comfortable.
What I didn’t realise was the impact of that grip change on my line. Without knowing it, I started taking the putter back a little straighter and squarer and slightly off the arc. The impact on short putts wasn’t massive, but anything beyond 4-5 foot became hit and miss and I couldn’t understand why. I didn’t think about the grip change because I didn’t expect it to have a big impact.
When you look at which grips work for you, you have to consider the following:
- Comfort – does something feel natural. Comfort is key but not the most important.
- Repeatability – can you repeat the grip consistently. If you’re going to hold your hand at a 33 degree angle with claw grip. Can you do that repeatedly, time after time after time.
- Distance control – can you maintain your distance control consistently on a variety of different green speeds and distances. It’s easy to do it on one speed, but adaptability becomes important.
- Accuracy over all distances – It’s one thing to hit a putt accurately with a short 6-8 foot putt, because you can be more accurate when you’re not swinging the putter as hard. Try hitting an accurate 50 foot putt with the same grip, because accuracy when you hit the ball harder is much harder to manage. It may even result in two grips. One for under 30 foot and one for over 30 foot.
- Putting arc – Accuracy is about staying on the arc and contrary to what most people think, the putting arc isn’t straight back. The biggest mistake I (and many others) have made is referring to putting as a pendulum, because pendulum assumes you take it back square on a 90 degree lie. A broomstick putter is on a 78-80 degree lie angle and that means the arc will reflect that. Only a 90-degree lie angle will result in a square putting path. I’d recommend buying a putting mirror with a putting arc so you can ensure you are taking the club back on the arc.


3. Switching won’t fix bad green reading
When I started putting well, I realised how bad my green reading was (and still is). If you think switching to a broom will solve all your putting problems, it may not. It does help fix alignment, but it won’t fix bad reads. Sometimes, people say they’re bad at putting when they aren’t. They’re taking the wrong lines because they are bad at reading breaks or because you’re starting by aiming at the wrong line.
Before you decide to move, find out whether it’s a reading problem or a putting problem. Find putting lines you know and try putting them from different distances. Suppose it’s going where it should, changing putters isn’t a fix for your problem. Learning to read the greens will or practice will. When I say practice, I mean matching putting speed to a read if you’re putting short or long. Practice putting on strong slopes regularly to allow yourself to be better at reading slopes. Try different speeds to see if dying it into the hole is the right approach. You can also do an Aimpoint or similar green reading course.

4. Your putting will go from good to bad and back to good again if you give it the time
People forget that you are dealing with years of putting that your body has become accustomed to. That means it takes a lot of practice to undo that muscle memory and develop new muscle memory. Why is that relevant?
Putting on a practice green is easy. There is no pressure, so missing the putt has no impact. When you are under pressure, things change, and you need to be able to putt from muscle memory to be consistent. You might consistently sink 4-foot putts, but imagine the pressure of a 4-foot putt where winning or losing means winning or losing $4 million, like a professional golf tournament. I can guarantee you’d suddenly miss 50% of the putts you’d usually make because you’d second guess the line, be worried about putting too hard, too soft, etc, instead of just hitting the ball.
What typically happens is when you’re out in practice rounds with your buddies after 3-4 hours of training, you’ll initially start putting well, maybe dropping to 28 putts or lower for a round because there is no pressure. Your buddies are impressed with your new putter, and some might even consider getting one.
When you play under pressure, such as in a club competition, things change. You’ll start to miss a few of the putts you’d previously got and see your score drop again to 33-35. You’ll get frustrated and feel like all the work you put into the broomstick wasn’t worth it, and you may even be tempted to sell it and put it down to a failed experiment.
A pro could likely do it because they have conditioned themselves to play under pressure, but we mere mortals playing club golf aren’t quite at that level. Pros are also more adept at building a routine and probably spend ten times more time practicing before they hit competitions.
5. Don’t try accelerate the putter with your bottom hand; let the weight of the putter do as much work as possible
Broomsticks move on a big arc and have a much heavier weight. That means that hitting the ball doesn’t require much force at all. You take the putter back and let the weight of the putter do the work, with minimal acceleration required. If you want to hit further, take a longer putting stroke. You may need some acceleration on the long putts, but the more bottom-hand acceleration, the greater the inconsistency of strike and distance control. Acceleration is hard to keep consistent. Letting something fall from a particular height gives you consistent results.
6. Start your putt with the shaft vertical
Broomsticks don’t rely on a forward press. The putter shaft itself should be the centre of your stance, like a clock hand at 6 pm, with the shaft vertical at a 90-degree angle to the direction of the putt. That means the ball should be slightly forward of centre, about one ball length, depending on the broomstick putter you’re using and the location of the shaft relative to the putter face. You want the putter to meet the bottom of the arc with the face at its squarest point, and with the putter travelling directly towards the target. If it’s early or later, that is less likely to be straight, but the closer you get to that arc point, the better the outcome.
7. Your eye still needs to be over the ball
Sometimes, there is a perception that a broomstick putter results in the ball being further away from you. The ball’s location, relative to the eyes, should be identical to a short putter. If you drop a ball from eye level, it should land on top of the ball sitting on the ground. This is one of the reasons people use putting mirrors, and a mirror is just as useful for broomstick putters.
This may seem inconsequential, but try this experiment: Line up 3 balls 15 to 20 feet apart in a perfectly straight line. Stand at the first ball, like you are planning to putt along the line. The balls should look like a straight line with your eye directly over the ball. The line won’t seem straight if your head is further over your feet. As a side note, if you wear prescription glasses, the line will probably seem curved irrespective of whether your eye is over the ball due to the curvature of the glass.
8. Practice all lengths; shorter putts could be challenging until you find the right technique
Different problems apply to different people but broomsticks introduce different dilemmas to your golf at different distances. It could make some things easier and some things harder. My lag putts became insanely accurate, both in strength and line. I’d constantly be within 1-2 feet on a 20-50 foot putt. It gives you a massive amount of confidence, but it comes at a price. I battled to sink shorter putts in the 4-6 foot range. It was harder to keep the putting stroke smooth on shorter putts due to the putter’s weight. I can honestly say that at one point on my broomstick journey, I was more confident in a 10-foot putt than a 5-foot. Suddenly, you find yourself in a dilemma. You’re gaining putts in one area and losing in another, and you feel like you’ve gone two steps forward and two steps back. I tried practising short putts, and it helped a little, but the problem was trying to keep a heavy head stable while moving it slowly. Think of it like trying to ride a motorbike slowly in a straight line. It’s hard because of the weight.
It was the motorbike analogy that gave me the solution that worked for me. When you ride a motorbike slowly, rather than trying to feather the throttle, you rev harder and hold the brakes. The combination creates a bit of tension in the bike that holds it steady and makes the process less jerky.
From a putting perspective, what this translated to me was using a much tighter grip on the lower hand. When I take long putts, I typically hold my right hand quite soft, maybe 30% strength. When I putt short putts, I hold it much tighter, maybe 60%. This translates to the “brake” on the motorbike and holds the putter steady on shorter putts. By holding the putter tight, it puts more tension in my body.
9. You may not like alignment balls, but they are great feedback tools.
Some of you may not like alignment balls, but they are great feedback on what the putter head is doing. My recommendation is if you don’t like using alignment balls, use them for practice. If you are hitting the ball properly, you should see the line roll end over end to the hole. If you hit it badly, it won’t. That’s important feedback because while you may occasionally miss shots where it rolls end over end, and you got the line wrong, you’ll miss lots where it doesn’t roll end over end, particularly in the 6-foot plus range. Practice with alignment balls and make sure you align every putt where possible.
It is also valuable for gauging the accuracy of your strikes at different distances. It’s much harder to get it rolling end over end on a 50-foot putt than a 6-foot putt, and the 50-foot ones are the ones you will miss by enough for a 3-putt. I’d also experiment with different alignment methods to determine what allows you to square the face best and keep the face square through the stroke. Personally, I’ve found the triple track style line seems to work best for me. I get the best roll when I use this alignment method, primarily because I seem to align my face correctly but alignment is different for everyone.

10. Develop a routine specifically for your broomstick that incorporates your arms/legs/head setup
Setting up to putt with a broomstick is more complex than a traditional putter. As I mentioned in a previous point, repeatability = predictability = success. Even if you repeatedly putt one degree to the left of the hole, you can plan on that by aiming one degree right. It only becomes a big problem when the miss is inconsistent.
If you want repeatability, you need to develop a routine that ensures:
- your feet are in the same position
- your lead elbow is in the same position every time
- your trail hand is in the same position
- the putter is in the same position and at the same lie angle
- your head is in the same position over the ball
- your shoulders are aligned with the target
- the head of the putter is pointed at the target
When you look at the above, it shows you how easily small things can go wrong. You may not miss a three or four-foot putt if they’re wrong, but you could easily miss a 6 to 8-foot putt, assuming you get the weight and break correctly. Some are similar to a short putter, but a few extra things exist.
That may contradict the view that broomsticks give more consistent results, but it doesn’t. What makes a broomstick accurate is that if you take the putter back on line, it’s more likely to remain on line for the putt. The routine is about ensuring you take the putter back online.
Here is my routine as an example:
- I line up a line on my ball (and hopefully a mark on the ground) with what I think is the correct line. I don’t do a practice putt.
- I line up my putter on the correct line and the shaft perpendicular to the target, ensuring the putter’s lie angle is flat on the ground. While doing this, I line up my right foot and have my left thumb on the top of the shaft with my left hand open, fingers straight, and my left elbow pointing at the target. This ensures my shoulders are square to the putting line.
- When I am happy, I close my left hand and position my left foot.
- I lift the putting off the ground and wait for any movement to stop.
- I rock my shoulders to putt.
The above isn’t as complex as it sounds. It happens naturally for me now, or more naturally than when I started. You’ll hear people talk about the importance of a routine, but when you change putting styles, you become acutely aware of the impact of not following a routine. Watch some of the pros, like Adam Scott or Lucas Glover, and you’ll see how strictly they follow a routine.
Conclusion
Whilst it’s essential to have a routine and get your putting to a point where it’s muscle memory on the course, avoid overthinking it.
Check from all sides of the hole so you know the break and whether it’s up or down. Then, pick your line, do your routine, and trust yourself to putt. If you make a mistake, learn from it and move on.
Putting is one of those areas where it’s easy to get trapped in a cycle of “ do X” or ”do Y”. It’s easy to guess second whether you got the line right or think about how you want to take the putter back. In reality, the thought we should focus on is trusting ourselves “ just putt it”. If you’re going to think of something as a swing thought to start your putt, make sure it’s something you can’t get wrong. If trusting ourselves isn’t enough, that points to a lack of practice, not thinking. Thinking about it more isn’t going to change that. The practice green will, another time.
This all sounds a lot, maybe a bit more scary, and I’ll be honest, that’s not the intention. This article isn’t intended to scare people, it’s just setting the right expectation so when things aren’t working from day one, you aren’t surprised. My shift to a broomstick has been a great and positive experience, it just wasn’t as smooth as I expected. It’s now at a point where I don’t think I could go back to a short putter.
It does still provide some entertainment, though. It’s those moments when I head to the practice green and I hear the snide comments from golfers who don’t know me. Then I start lining up putts, and their demeanour changes. The laughs end, and the only time I hear a snide comment it’s a comment about banning broomsticks. I normally take that as a compliment.


Leave a reply to The Overrated Photographer Cancel reply